A Grey Filled Wall On Revit Floor Plan

Solved How To Change Wall Color In Plan View Autodesk Community Revit Products

Wall Solid Fill With Revit Youtube

Solved How To Change Coarse Fill Color Autodesk Community Revit Products
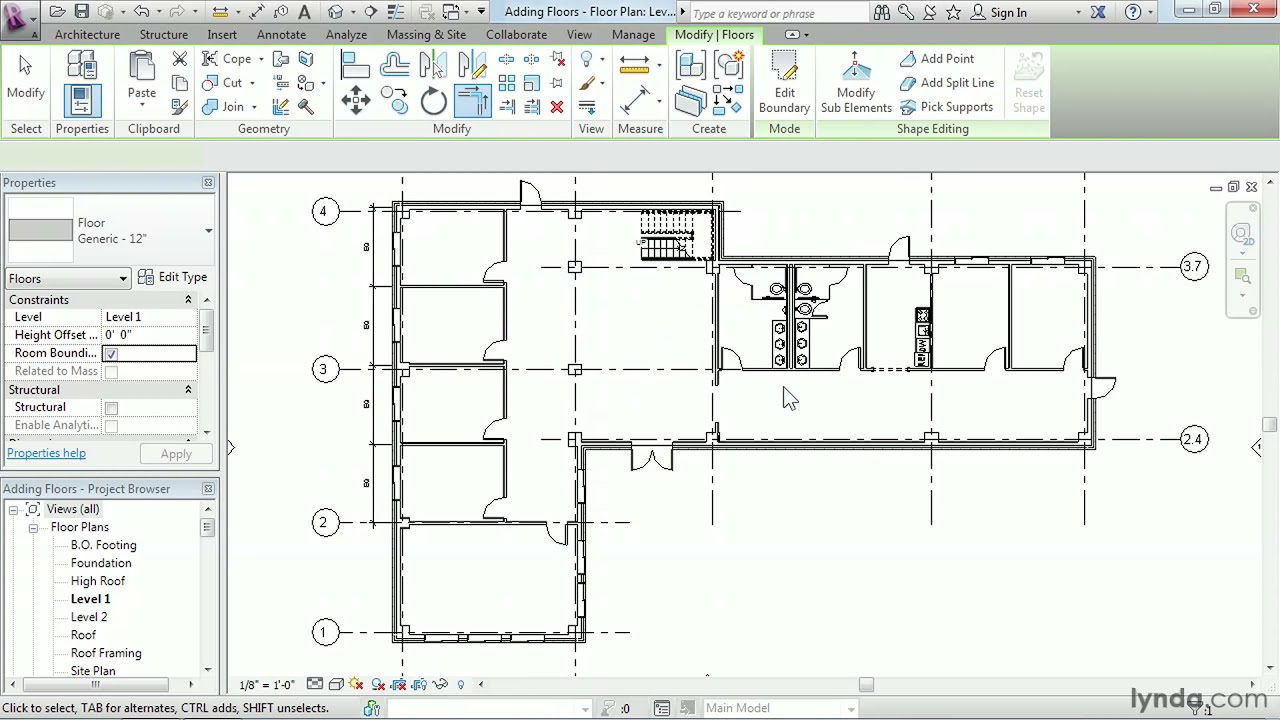
Revit Architecture How To Work With Floors Lynda Com Tutorial Youtube

Pin By Joelle Powers On Autodesk Revit Tips Revit Tutorial Architecture Student Tutorial

Revit Tutorials Color Scheme Youtube

To prevent the floor or slab from being visible in plan view you need to adjust the bottom clip so that it is more than 4 feet above the floor or slab and set the view depth so that it does not include any part of the floor or slab.
A grey filled wall on revit floor plan.
Revit Wall Wrap Closure A How To Guide Youtube

Therevitkid Com Tutorials Tips Products And Information On All Things Revit Bim Bim After Dark Ultimate Revit Architecture Bim Architectural Thesis

Tileable Grey Brick Wall Texture Maps Texturise Free Seamless Textures With Maps Brick Texture Textured Carpet Texture

Collection Uptown Colour Grey Floor Tiles Luxury Restaurant Interior Restaurant Flooring Restaurant Interior Design

Energy Efficient Revit Construction Details Energy Efficient Construction Detailed Drawings Architecture Details

Mass Metric Mass Organic Form Modeling Organic Form Bim Organic

Revit Window Family Revit Family Revit Families Revit Architecture Architecture Windows
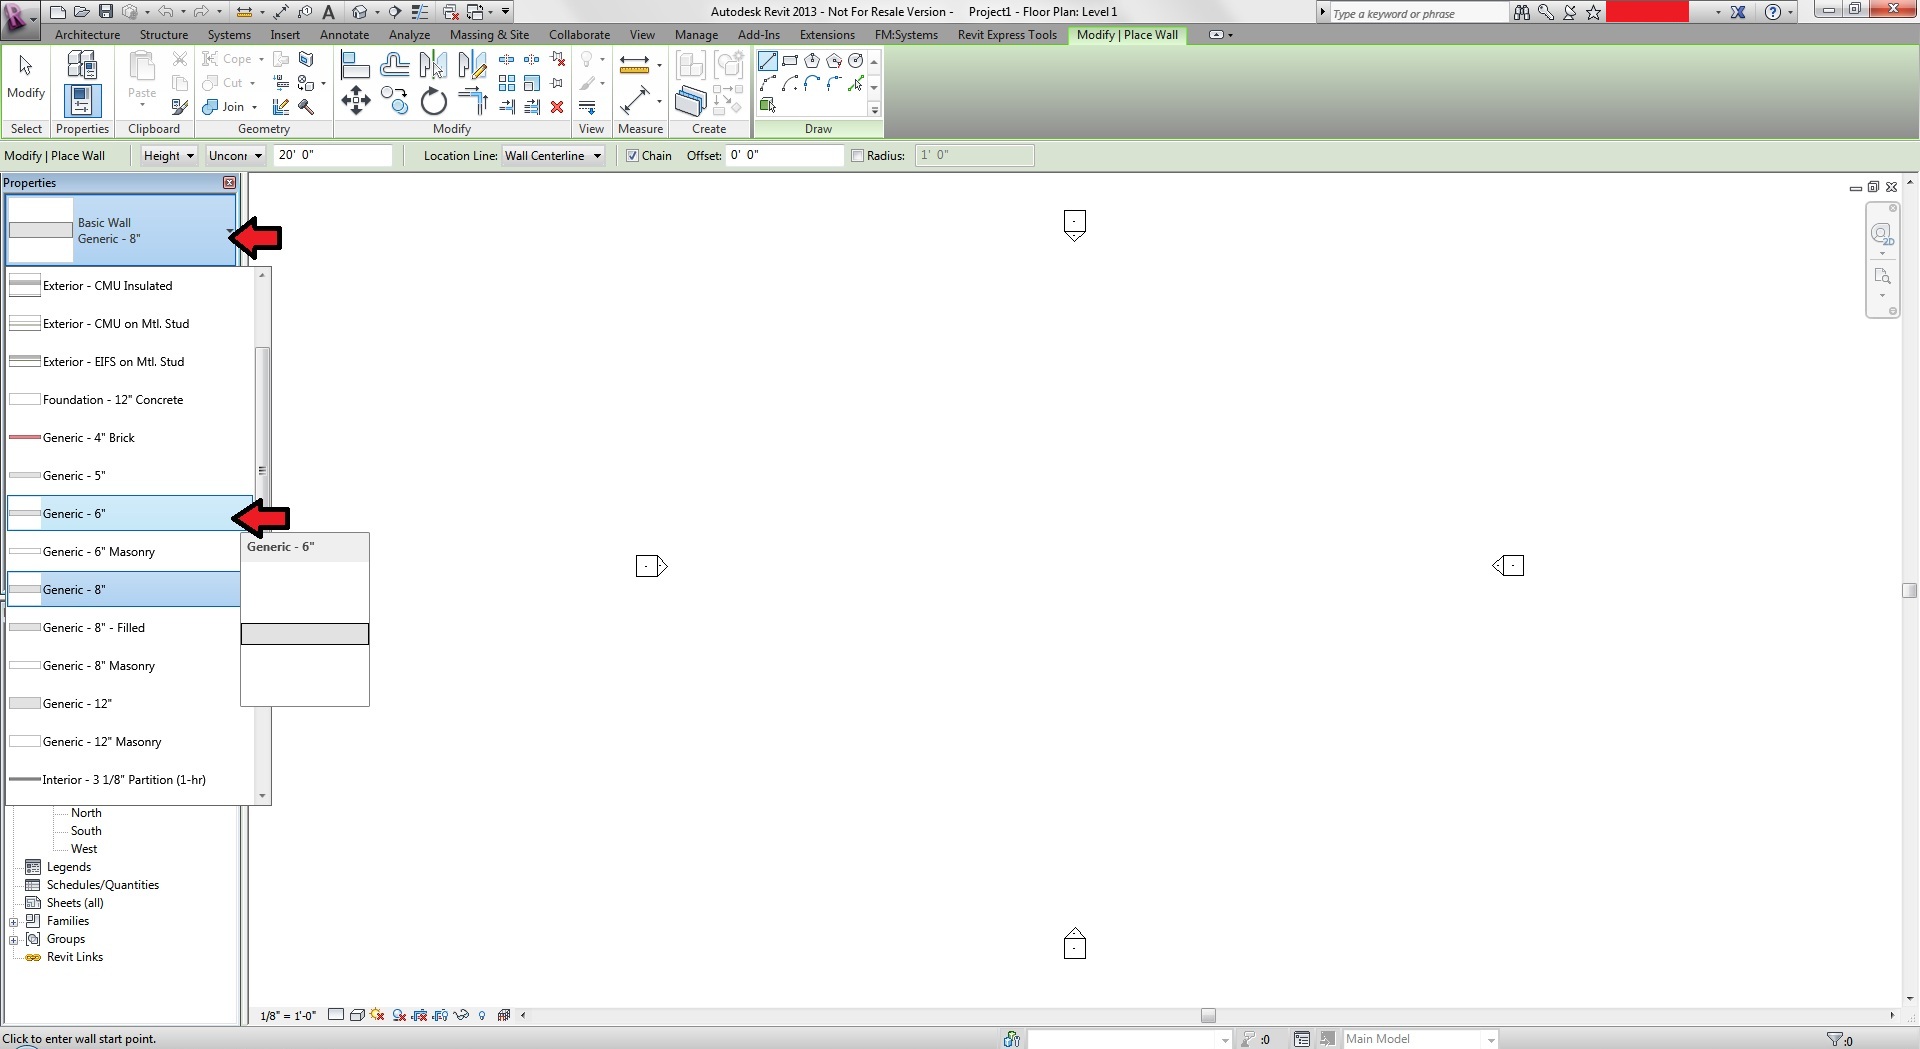
6 Generic Wall Autodesk Community Revit Products

Revit Painting Walls Youtube

Tutorial Key Schedules In Revit For Mep Engineers Revit Tutorial Tutorial Engineering

12 Smart Ways To Save Time In Revit With Dynamo Archsmarter Revit Architecture Save Ways To Save

Revit Wall Tags And Wall Types Legend School Architecture Tags Structure Architecture

Foundation Walls Wall Function Bd Mackey Consulting The Revit Geek Blog Foundation Wall Function

Luxury Apartment With An Industrial Vibe And A Cool Hallway Planirovki Kvartira Proekty

Sl Villa On Behance Revit Architecture Villa Landscape Design

Foundation Walls Wall Function Bd Mackey Consulting The Revit Geek Blog Foundation Wall Function

Drafting Door Symbol Lovely Drawing Sliding Doors Floor Plan Sliding Movable Walls Folding Doors Sliding Doors

Modify The Vertical Structure Of Walls Youtube
Https Encrypted Tbn0 Gstatic Com Images Q Tbn 3aand9gctwwmcg4yejedclvsdc5uddhbjcw8agiwtmdoqm8huqb4d2asrs Usqp Cau

Pin On 25000 Autocad Blocks Drawings

The Penny Parlor Basement Colors Basement Paint Colors Basement Decor

Pin On Sit

Chernaya Vannaya Komnata Chernye Vannye Komnaty Chernye Vannye Dom

Zaharava Apartment White Room Decor Kids Interior Room Small Apartment Layout
Source : pinterest.com
